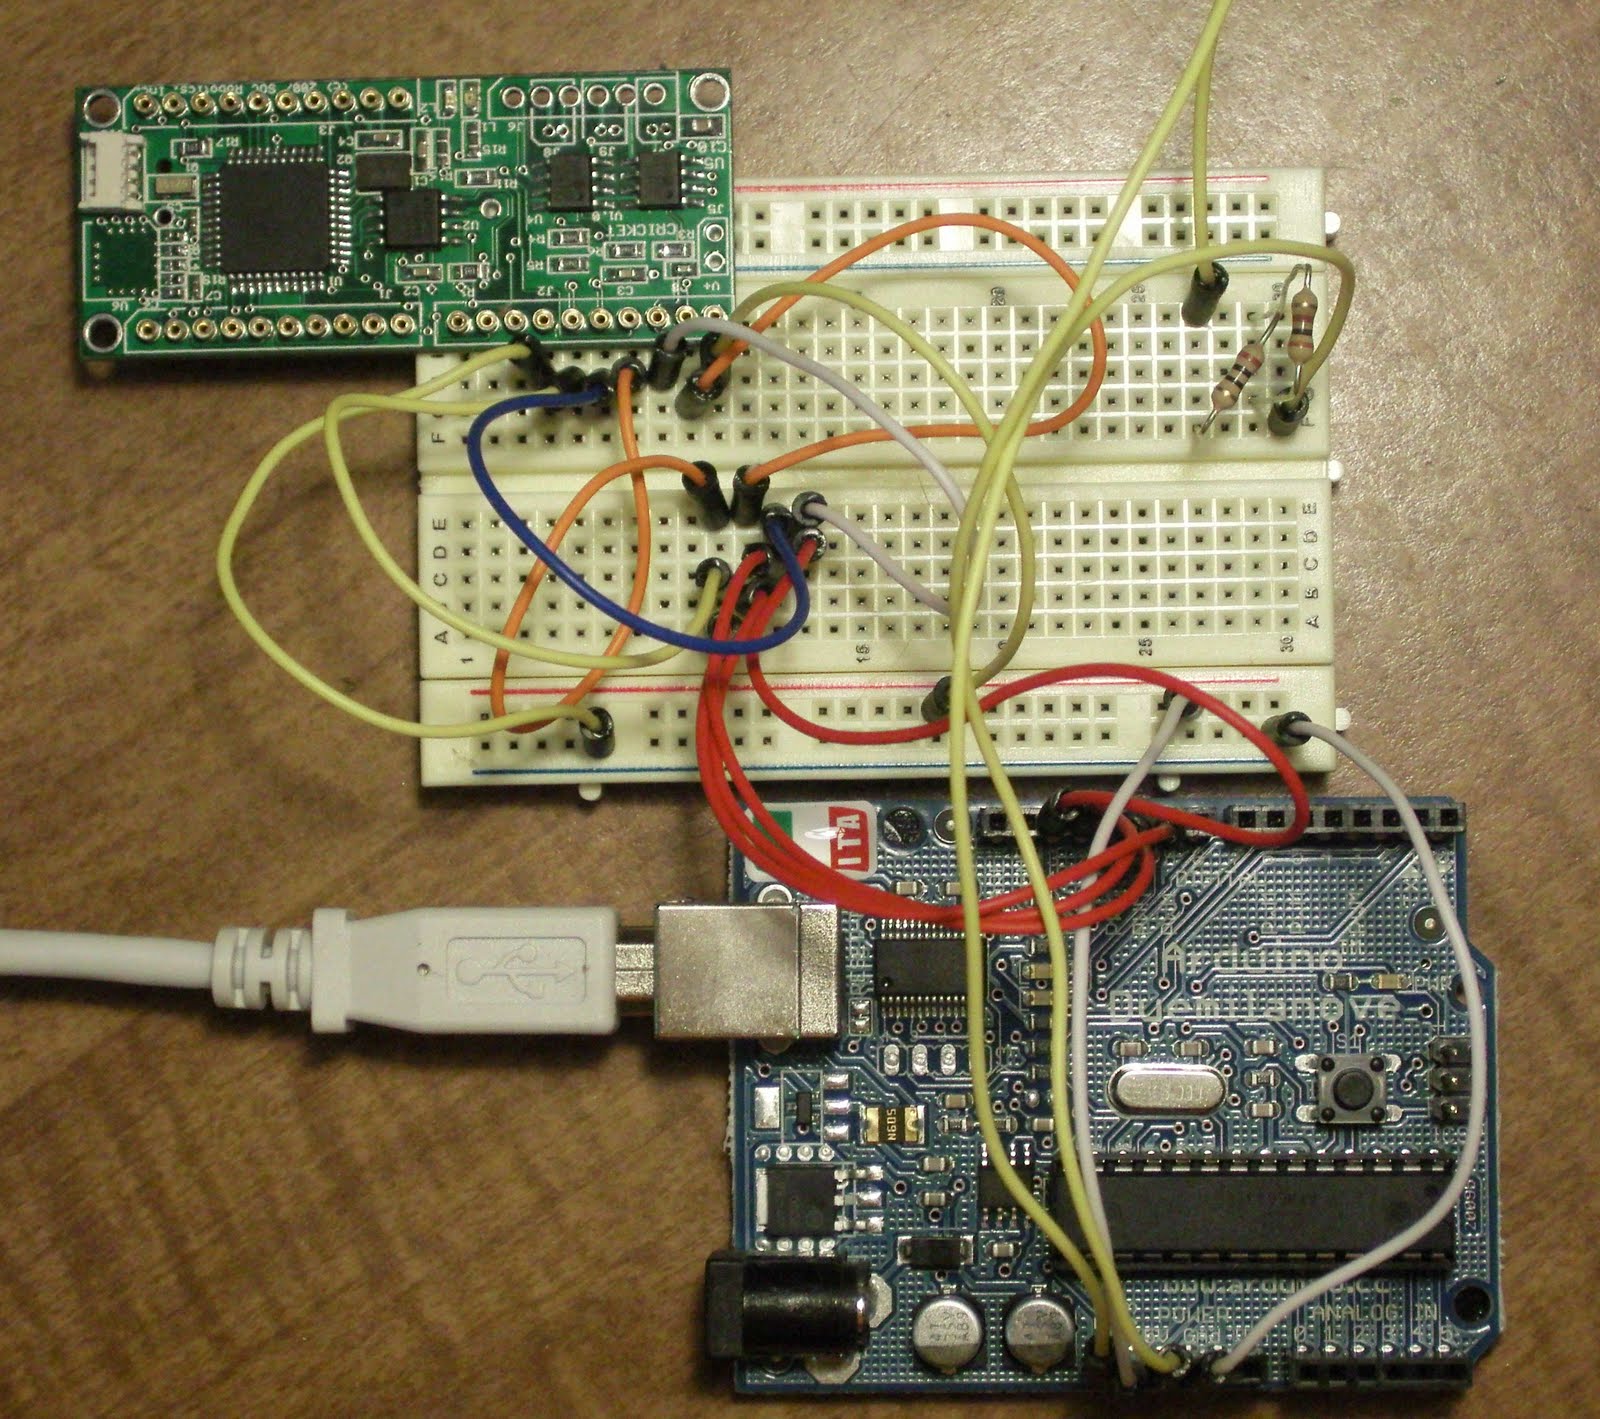
 To the left we see the simple circuit to program the Cricket. This is a second breadboarding based upon my last post to make sure it's correct. One thing the shown circuit lacks is the LEDs (and resistors, don't forget them!) hooked up to pins 7-9 to see it the Cricket being programmed by the Duemilanove successfully, but the circuit works. The resistors in the upper right, are to disable auto-reset.
That brings us to Step 2: Getting the Arduino software to work with the Cricket. For this I originally thought that it required modifying a line in the Arduino software itself, fortunately this is not the case, because when tracking the code backwards, I discovered the upload.using parameter of boards.txt, something which controls the list of boards you see in the Arduino program under the Tools menu.
 If you open the Arduino software (I assume you know how to install it for your OS, I found it best to install the packages for Ubuntu, then download the standalone (I actually used svn, as I was looking to patch it for a while.) because we also have to install the Sanguino extension to Arduino. Sanguino is another hardware board similar to the official Arduinos, such as Duemilanove or earlier models, but using the Atmega644P, as opposed to the Atmega8/168/368 series (used in official Arduinos). This is almost what we want, as the differences between the 644 and 644P appear to be negligible, aside from the addition of a second USART in the 644P, and a few power saving changes. Fortunately, even though the Sanguino project uses the 644P, the software extension to Arduino is compatible with the 644. (Provided no bugs exist, and there are always bugs.) The instructions to install Sanguino are on the front page, I'm assuming you can copy a directory, into another.
Now, my image shows an entry for the Cricket. We really want to have that entry, so in the 'Sanguino' directory you just copied, locate the boards.txt file. We need to tell it about the Cricket, this means telling the Arduino software what to use to program it, what speeds, and what fuse settings (those may not be absolutely necessary, but I have not tried them without it.) Add the following to the end of boards.txt, which should have very similar entries, but for Sanguino.whatever. Note, this is for a 10MHz one, for other speeds, you will have to adjust the build.f_cpu frequency setting, and possibly the fuses (these settings come in the download below)
cricket10.name=Cricket 10 MHz (Atmel 644 @ 10 MHz)Then copy the bootloader from the download of Soc-robotic's Chinook firmware bootloaders/atmega644/BootLoader_Cricket_10MHZ.hex (Some of this comes from me looking at this blog entry which focuses on the Wasp, but helped me figure this out for the Cricket. Though, I think the only setting which is the same is the two atmega644 settings.)
cricket10.upload.protocol=arduino cricket10.upload.maximum_size=63488
cricket10.upload.speed=19200 cricket10.upload.using=arduinoisp
cricket10.bootloader.low_fuses=0xEE cricket10.bootloader.high_fuses=0xDC
cricket10.bootloader.extended_fuses=0xFF cricket10.bootloader.path=atmega644
cricket10.bootloader.file=BootLoader_Cricket_10MHZ.hex
cricket10.bootloader.unlock_bits=0x3F cricket10.bootloader.lock_bits=0xCF
cricket10.build.mcu=atmega644 cricket10.build.f_cpu=10000000L
cricket10.build.core=arduino
We should be all set, on the desktop. There's one more piece of software to load, this one is the programmer on the Duemilanove. Start the Arduino software, and check that everying prior works, by going to the Tools->Board menu which looks like the one pictured above, and have entries for "Sanguino", and "Cricket 10MHz (Atmel 644 @ 10 MHz)". If so, you are good to this point. From here, select your Arduino's port and then from the Tools menu, your port. (On Linux this is commonly /dev/ttyUSB0 or /dev/ttyUSB1.)
 Now we need to open the (provided) sketch for using the Arduino as an ISP, so go to File->Examples->ArduinoISP. Now, you need to possibly compile and upload to your Duemilanove. First, from the Sketch menu, click Verify/Compile. In the lower blue bar, it should say "Compiling..." then switch to "Done Compiling." For now, disconnect a pin from the resistors which disable the auto reset. After it does, (if there are no errors, which would be in the form of red text inside the black box) you need to upload it, via File->Upload to I/O board. The blue bar should say "Uploading to I/O board", then "Done Uploading". If it shows no errors, you are ready to move on to uploading to the Cricket. If you connected LEDs to pins 7-9 (don't forget the resistors!), then they should light up then go out in the order 7, 8, 9, with 9 staying lit but sort of pulsing, to show it has uploaded. After this is done, you can reconnect the resistors to disable the autoreset.
Now, go back to the board menu, and select the Cricket entry. For this, we will use the Blink example, and then modify it to make sure it's working (and for a little example of programming.) Go to the File->Examples menu again, this time instead of ArduinoISP, open the Digital folder and find the 'Blink' example. (The example should be at the top.). Now, Repeat the Compile/Upload process (the shortcuts are Ctrl-R for compile, and Ctrl-U for upload). If you connected LEDs, you should see the one connected to 9 remain on (as usual), but also the one connected to pin 7 (programming) light up for a bit. If pin 8's lights up, that indicates an error. (I haven't seen this happen, so my advice would be double check your circuit, and try once again. After that, start googling for the problem, or asking for help.)
Once the programming led goes out, and/or the software says Done uploading, one of the two LEDs should start to blink every second. That's great, but I've noticed the cricket sometimes blinks with whatever bootloader it had. So to make sure we know that it is right, we shall use both LEDs. On the row after to where it says int LedPin = 13;, add the line "int LedPin2 = 12", and replicate each line with LedPin in it, on the line below it, with LedPin2 substituted for LedPin. Then in the loop() function, on the LedPin2 lines, change LOW to HIGH and HIGH to LOW, this will cause the LEDs to alternate, every second. Compile, then upload it again. and the LEDs should start a slow alternation every second. You can also adjust how long each one is on, by changing the number of microseconds in the delay functions, say 100. So change both occurances of 1000 to 100, and Compile/Upload, and the two LEDs should fairly rapidly alternate.
That should be all for now, next post will talk about controlling a DC motor and possibly stepper motors.
No comments:
Post a Comment